Biscotti is Italian, it's a form of twice-baked cake or cookie. It's wonderful for dipping in coffee or cocoa, so you see it quite a bit at fancy cafes, often fairly expensive. It's certainly one of those treats that seems difficult to make. In fact, an Italian ex-boyfriend of mine went on and on about how NOBODY can make proper biscotti... sounds like a direct challenge to me ;)
I looked around the interwebz for a while checking out biscotti recipes. It did begin to seem like many of them were complicated or used fancy ingredients (anise seed? Does anyone actually LIKE that stuff??)... not my style. So when I found this recipe for a wonderful quadruple-chocolatey version, I was thrilled and couldn't wait to try it. And it turned out fantastically, if I do say so myself!
The recipe is not complicated in the slightest but is a bit time-consuming. But the results are very professional looking... totally worth it.
To get started, we preheat the oven to 375, and gather our ingredients.
You will need:
1/3 cup softened butter
2/3 cup white sugar
2 eggs
1 tsp vanilla
1-3/4 cup flour
1/3 cup cocoa powder
2 tsp baking powder
1/2 cup miniature semi-sweet chocolate chips
1 egg yolk, beaten
1 tbsp water
1/2 cup dark chocolate wafers
1/2 cup white chocolate wafers
First, line a baking pan with parchment paper.

Parchment paper is great stuff. A paper you can bake in the oven without setting your kitchen on fire? Don't ask me how it works, I have no idea. It's easy to come by, it'll be in with the plastic wrap and aluminum foil in your grocery store, or in the baking department of any craft store.
If you don't have parchment paper, you can grease your baking pan instead... but parchment paper is so much tidier!
Note: do not, I repeat DO NOT use wax paper. It's NOT the same thing, and if you don't want a horrible smell to emanate from your oven, you will take my advice!
Moving on!
Start out by creaming together the butter and the sugar until fluffy.

Add the eggs one at a time, then the vanilla. The batter will be quite runny, but never fear.

In a separate bowl, whisk together the flour, cocoa powder and baking powder.

Slowly add to the batter. It will get really stiff, so you are better off mixing by hand rather than with an electric beater.

Once it's all combined, add the chocolate chips. Now, I used regular sized chips, but you really are better off with the minis. (Think about it this way-- you get more of them!) But... in my world... when you are shopping with a toddler and a newborn, it's just so much easier to grab whatever works and go, lol. So regular sized chips it is.

When the chips are well mixed in, separate the dough into two equal sections, and roll into logs-- about 6-8" long and 2" wide is good-- and flatten. Make sure to place the logs as far apart as possible, as they will spread a bit.

Mix together the beaten egg yolk and the tablespoon (or so) of water, and brush onto the top of your dough.

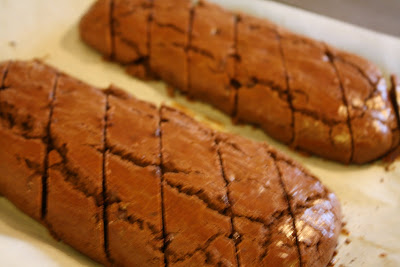
Bake for 20-25 minutes or until the logs are firm. They look amazing when they come out... and they smell great too :)


Using a serrated knife, slice diagonally into 1"-ish strips.

Separate the strips and place them on their sides.

Put them back in the oven and bake for 10-15 minutes per side.
Meanwhile, time to make the decoration.

Get out your trusty chocolate wafers. The wafers are great because they are made for melting... sometimes actual chocolate chips or chunks can be delicate to handle. If they get too hot, or get the slightest hint of moisture in them, they will crystallize and become grainy. Chocolate wafers are your friend.
I used both dark and white chocolate for drizzle, because it makes a nice presentation. You can try anything you want... peanut butter chips, butterscotch chips, mint chocolate chips? The chocolate biscotti makes a great base for any flavour.
Melt your wafers (I did dark chocolate first, then white) in a glass bowl in your microwave, 30 seconds at a time. I have a pretty weak microwave and it only took me 2 rounds to get the wafers smooth and melted. If they don't seem quite done, stir like crazy instead of putting them back in the microwave.

Once they're melted, drizzle over the biscotti. I used a small-holed frosting tip and it came out beautifully.

In fact, they came out SO beautifully, I just kept taking picture after picture of them.


Okay, okay, I'll stop before I bore you silly.
Anyway, once the chocolate is dry, you can chow down, store in an airtight container (NOT in the fridge), or wrap to give as gifts. I suggest putting one or two pieces in a decorative plastic bag (you can find those anywhere-- Wal-Mart's holiday section, or again the handy-dandy craft store), tying the top with a piece of ribbon and adding a label or tag. They are great to give with homemade cocoa mix, too.

But definitely save some for yourself. These are fantastic with your morning coffee... not too sugary, just a bit of sweetness to get you going.
Hope you enjoyed this recipe, I sure enjoyed making it :) Stay tuned for more!


No comments:
Post a Comment