Sunday, December 5, 2010

My True Love Gave To Me: Peanut Butter Dog Biscuits

Today's recipe is so easy that I actually hesitated putting it on here. It's almost TOO easy, if there is such a thing :) But, the mission of this blog is to bring you recipes that are "easy and amazing", and this is certainly one of those.

Everyone knows how important our canine friends are to us, and how much they deserve their own gifts at Christmas! What better way to treat them-- and also to know that they are eating something that is completely healthy and natural, with no by-products or unpronounceable ingredients? AND, this is an adorable, impressive gift that will be truly appreciated by both the human and canine recipients!

So, you wanna see how easy this is? Preheat your oven to 375, then gather up:

2 cups of whole wheat flour-- as an aside, this stuff is fantastic for dog biscuits, it makes a thicker, heartier texture than regular flour.


1 tbsp baking powder
1 cup natural peanut butter
1 cup milk

See, only four ingredients, and in easy measurements!

In one bowl, whisk together the flour and baking powder.


In another bowl, stir together the peanut butter and milk until smooth. I found a wooden spoon to be the best tool for this.


Then, add the flour mixture slowly to the peanut butter mixture...


... and stir it all up. If it seems too dry to form a dough, add a bit more milk. It will never harm your baking to add a bit more milk or water, just don't go too far-- you can always add more, but you can never take it back if it becomes soup :)

Once it's all combined, collect it all into a ball and plop it onto your counter. "Plop" is a technical baking term, by the way. Oh, and I do recommend wax paper to keep your counters clean.


Flatten your dough ball, using your rolling pin or just your hands. Then, get out your cookie cutters and have at it! I often use a mini dog-bone shape, but in the spirit of the holidays, I went with my mini Christmas shapes. You can make these in any size, depending on the size of the dog receiving the biscuits.


Aren't they cute, all ready to go into the oven?


Bake for about 20 minutes, or until brown. Then let them sit out for an hour or so-- they will harden as they sit.


Now you package them, any way you want. Personally I love these adorable little Martha Stewart treat bags:


But a clear cellophane sack tied shut with some ribbon would be cute too, and easy!

I KNOW you want to try this, so I'll let you go :) Your puppies, and your friends' and family's puppies, deserve a treat!

Sunday, November 21, 2010

My True Love Gave To Me: Chocolate Chocolate Biscotti

Well, I promised you I would be bringing you gift ideas for the holidays... I was going to save all the holiday treats until December but I couldn't wait to get started :) So we begin the series I will call "My True Love Gave To Me" with something I adore: biscotti!

Biscotti is Italian, it's a form of twice-baked cake or cookie. It's wonderful for dipping in coffee or cocoa, so you see it quite a bit at fancy cafes, often fairly expensive. It's certainly one of those treats that seems difficult to make. In fact, an Italian ex-boyfriend of mine went on and on about how NOBODY can make proper biscotti... sounds like a direct challenge to me ;)

I looked around the interwebz for a while checking out biscotti recipes. It did begin to seem like many of them were complicated or used fancy ingredients (anise seed? Does anyone actually LIKE that stuff??)... not my style. So when I found this recipe for a wonderful quadruple-chocolatey version, I was thrilled and couldn't wait to try it. And it turned out fantastically, if I do say so myself!

The recipe is not complicated in the slightest but is a bit time-consuming. But the results are very professional looking... totally worth it.

To get started, we preheat the oven to 375, and gather our ingredients.

You will need:

1/3 cup softened butter
2/3 cup white sugar
2 eggs
1 tsp vanilla
1-3/4 cup flour
1/3 cup cocoa powder
2 tsp baking powder
1/2 cup miniature semi-sweet chocolate chips
1 egg yolk, beaten
1 tbsp water
1/2 cup dark chocolate wafers
1/2 cup white chocolate wafers

First, line a baking pan with parchment paper.


Parchment paper is great stuff. A paper you can bake in the oven without setting your kitchen on fire? Don't ask me how it works, I have no idea. It's easy to come by, it'll be in with the plastic wrap and aluminum foil in your grocery store, or in the baking department of any craft store.

If you don't have parchment paper, you can grease your baking pan instead... but parchment paper is so much tidier!

Note: do not, I repeat DO NOT use wax paper. It's NOT the same thing, and if you don't want a horrible smell to emanate from your oven, you will take my advice!

Moving on!

Start out by creaming together the butter and the sugar until fluffy.


Add the eggs one at a time, then the vanilla. The batter will be quite runny, but never fear.


In a separate bowl, whisk together the flour, cocoa powder and baking powder.


Slowly add to the batter. It will get really stiff, so you are better off mixing by hand rather than with an electric beater.


Once it's all combined, add the chocolate chips. Now, I used regular sized chips, but you really are better off with the minis. (Think about it this way-- you get more of them!) But... in my world... when you are shopping with a toddler and a newborn, it's just so much easier to grab whatever works and go, lol. So regular sized chips it is.


When the chips are well mixed in, separate the dough into two equal sections, and roll into logs-- about 6-8" long and 2" wide is good-- and flatten. Make sure to place the logs as far apart as possible, as they will spread a bit.


Mix together the beaten egg yolk and the tablespoon (or so) of water, and brush onto the top of your dough.


Bake for 20-25 minutes or until the logs are firm. They look amazing when they come out... and they smell great too :)


Using a serrated knife, slice diagonally into 1"-ish strips.


Separate the strips and place them on their sides.


Put them back in the oven and bake for 10-15 minutes per side.

Meanwhile, time to make the decoration.


Get out your trusty chocolate wafers. The wafers are great because they are made for melting... sometimes actual chocolate chips or chunks can be delicate to handle. If they get too hot, or get the slightest hint of moisture in them, they will crystallize and become grainy. Chocolate wafers are your friend.

I used both dark and white chocolate for drizzle, because it makes a nice presentation. You can try anything you want... peanut butter chips, butterscotch chips, mint chocolate chips? The chocolate biscotti makes a great base for any flavour.

Melt your wafers (I did dark chocolate first, then white) in a glass bowl in your microwave, 30 seconds at a time. I have a pretty weak microwave and it only took me 2 rounds to get the wafers smooth and melted. If they don't seem quite done, stir like crazy instead of putting them back in the microwave.


Once they're melted, drizzle over the biscotti. I used a small-holed frosting tip and it came out beautifully.


In fact, they came out SO beautifully, I just kept taking picture after picture of them.


Okay, okay, I'll stop before I bore you silly.

Anyway, once the chocolate is dry, you can chow down, store in an airtight container (NOT in the fridge), or wrap to give as gifts. I suggest putting one or two pieces in a decorative plastic bag (you can find those anywhere-- Wal-Mart's holiday section, or again the handy-dandy craft store), tying the top with a piece of ribbon and adding a label or tag. They are great to give with homemade cocoa mix, too.


But definitely save some for yourself. These are fantastic with your morning coffee... not too sugary, just a bit of sweetness to get you going.

Hope you enjoyed this recipe, I sure enjoyed making it :) Stay tuned for more!

Sunday, October 31, 2010

Pumpkin cupcakes

Happy Halloween, all!

This has been a very hard week, there was an unfortunate death in my fiance's family and something it has taught me is that one of the most important things in life is to make each other happy, and show each other how much we care before it's too late. Making other people happy and showing them you care can be a simple thing... obviously, I personally often turn to baking :) It happens to be something I am good at and enjoy, and it's a sweet way-- pun most definitely intended-- to share your love with someone or someones.

So, do me a favour today and hug your loved ones tight. Don't get too distracted by the Halloween stuff that you forget to tell each other how much you care.

On that note!

I knew I wanted to make a Halloween treat, but there are a few ways it can go. You can go cutesy (like Rice Krispies ghosts or sugar cookie witches' hats), or traditional (like caramel apples, or popcorn balls), but I wanted something a little bit more sophisticated.

I know I said last week that I love cinnamon... another thing I love is pumpkin. Pumpkin scones, pumpkin pancakes, and of course, pumpkin cupcakes! (Ironically, I'm not a huge fan of pumpkin pie, but if you put enough whipped cream on it I'll eat almost anything...)

I went looking for a good pumpkin cupcake recipe, and I began to discover they are ridiculously complicated. Some of them require an enormous list of different spices... and I'm sure they're delicious, but seriously, I was getting tired just reading the recipes!

I persevered, looked through my entire recipe stash, various books and online sites, and found a recipe that seemed to have the perfect amount of spice but was still fairly straightforward.

The recipe came with the typical topper for pumpkin cupcakes-- cream cheese frosting. That just didn't sit right with me either. For one thing I'd done a cream cheese frosting for you two weeks ago, and for another, who decided that pumpkin and cream cheese go together anyway? So I began searching again, this time for an appropriate buttercream with just a touch of spice itself.

I had a picture in my mind of what I wanted to make, but I felt like it was missing something. Then one day, these caught my attention...


They look like fairy tale pumpkins, sparkly and sweet. Exactly what I wanted for the piece de resistance on top of my cupcakes... adorable and attractive but still not cutesy.

I also found these, and it was love at first sight:


Black, ruffly cupcake liners, so perfect for Halloween-- they look like Goth tutus... I love!!

So, with the bottom layer (liners) and the top layer (candy pumpkins) in hand, we gather the rest of our ingredients.

You'll need:

1-1/2 cups flour
1 tsp baking soda
1 tsp cinnamon
1/4 tsp ground ginger
1/4 tsp ground cloves
1/2 tsp salt
1/2 softened butter
1 cup sugar
2 eggs
1 tsp vanilla
3/4 cup (packed) canned pumpkin puree

You know the drill-- set oven to 350 and line your cupcake pan. I'm going for the full-size guys this time...


In a large bowl, whisk together the flour, baking soda, spices and salt.


Set aside. In another bowl, add the butter and sugar, and beat on high until light and fluffy. Add the eggs one at a time, beating well in between.


Beat in the vanilla extract, then scrape down the sides of the bowl.


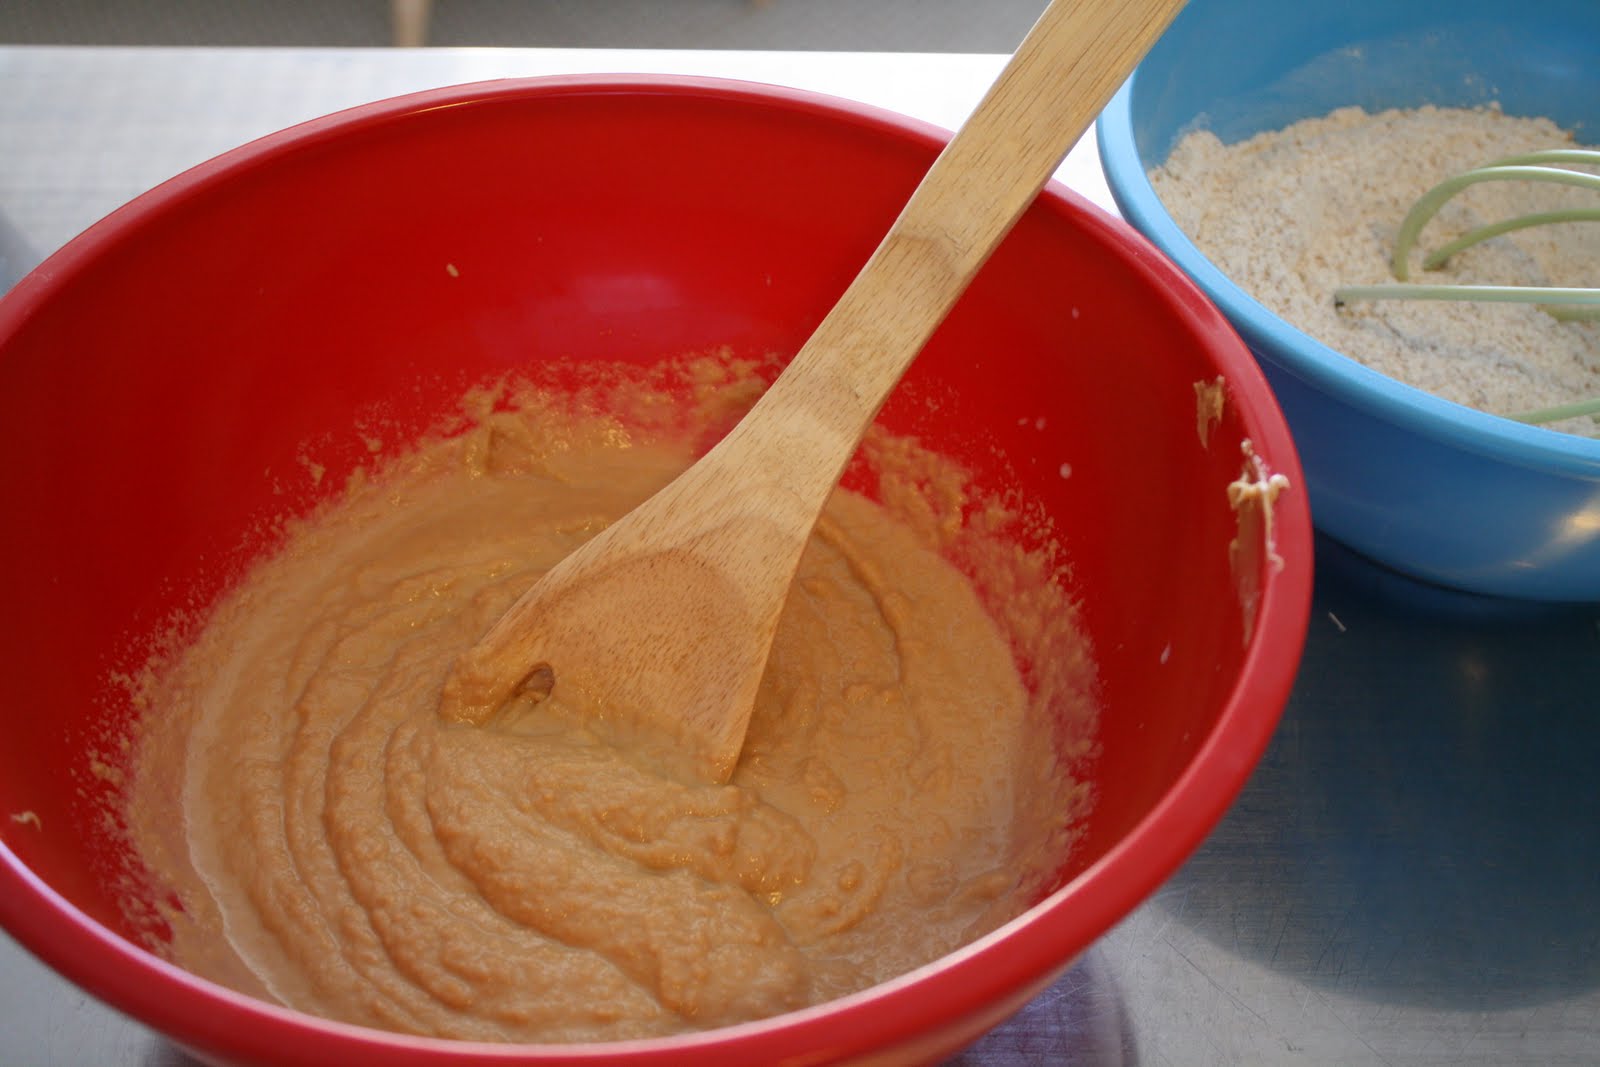
With your beaters on low speed, alternate adding the flour and pumpkin in batches, starting and ending with the flour.


Doesn't the batter turn a gorgeous colour? And it smells amazing, I love fall spices. If it seems to separate a bit when you add the first batch of pumpkin, don't worry-- the flour brings it all together again.

Once thoroughly mixed, spoon into your liners. This recipe makes only 12 full-size cupcakes or 24 minis, so you might want to double it if you're making these for a party.


Bake for about 20 minutes, or until they pass the toothpick test. (Insert a toothpick into the middle of a cupcake, if it comes out clean, they are done.)


In the meantime, start your buttercream. You need:

1/2 cup softened butter
1/4 cup vegetable shortening
1/3 cup DARK brown sugar, packed
1/2 tsp cinnamon
3 cups powdered sugar
3 tbsp half and half

Add the butter and shortening to a bowl and cream together until fluffy. Then, add the brown sugar.

Isn't this stuff great? It's sparkly, and smells like molasses. Just beautiful.


Add the cinnamon as well, and beat until well combined.


Alternate adding the powdered sugar and half and half, beating well in between. Once completely beaten in, turn your beater up and beat a few minutes more, until the buttercream is stiff.

I used a large star tip to pipe the frosting onto the cupcakes.


And of course, the final touch!


And here you go... lovely, whimsical, and of course-- delicious Halloween cupcakes!


I hope everyone has fun and is safe tonight! And don't forget... if you attempt any of my recipes, send me a pic and I'll post it.

Happy Halloween!

Sunday, October 24, 2010

Cinnamon sugar cupcakes two ways

I've got to say... I LOVE cinnamon. Seriously, I can't have enough of it. These cupcakes are an amazing way to use cinnamon, and I am bringing them to you today with a choice of two different types of topper-- because some people like their cupcakes with a ton of sweetness, others only like a little.

I also bring you, my little helper!


This is my fiance's 3-year-old son waiting patiently for us to start making cupcakes. He is a very appropriate helper because these cupcakes are easy enough for kids to make. (With supervision, of course!)

Seriously, these are so easy and so tasty, you will never go back to cake mix again.

Anyway! As with any cupcake recipe, you start the same way: preheat your oven (to 350 today), prep your cupcake pan with liners...


(... my helper is a bit random in his placing of the liners... but hey, as long as they all get in there!)

... And gather your ingredients.

For these cupcakes you will need:

2 cups flour

1 tsp baking soda

3 tsp cinnamon

1 cup sugar

1/3 cup brown sugar

1/2 cup butter, softened

2 eggs

1 cup applesauce


This is a one-bowl recipe. (I TOLD you it was easy!) So, in a big bowl, whisk together the flour...


..baking soda, cinnamon...


and sugars.


Whisk together well.


Add the wet ingredients-- applesauce, butter and eggs.


Beat well. It's easiest to use electric beaters for this.

This batter is quite thick, and smells amazing... apple-y and cinnamon-y. It's quite different in texture from the lemon cupcake batter-- you'll see. It's another delicious batter to snack on... but it's not appropriate for children. Raw eggs and kids just don't mix.

When well beaten, transfer to your cupcake liners.


Bake for about 15 minutes or so, then use the toothpick test to make sure they're done.


Now... on to the two types of topper. The first we will work on is a cinnamon glaze.

You'll need...

1 cup powdered sugar
1 tsp cinnamon
1/2 tsp vanilla
Heavy cream


Combine the sugar and cinnamon and whisk together.


Add the vanilla, then slowly add the cream one tablespoon at a time, stirring in between. It will not take much at all, probably about 3 tablespoons, but it depends on how exact your sugar and cinnamon measurements. When it's done, it should be thin enough to spread, but be careful not to get it too thin or it will all just slide off your cupcake. (Don't ask me how I know this, lol...)

It should look like this:


My little helper has a little baker's set that has an adorable little frosting gun. I filled that sucker up with glaze and he went to town:


For those of us a little bit more obsessive-compulsive about frosting (who, me?), a small round tip like this is good:


I chose a cross-hatch pattern but anything is pretty in this lovely glaze.


My helper says it's yummy too :)


On to the other topper, a cinnamon buttercream. Mmmmm...

1/2 cup butter, softened

3 cups powdered sugar

3 tbsp milk

1 tbsp maple syrup

1 tsp cinnamon

1 tsp vanilla

Butter goes first into the bowl, then add one cup of powdered sugar. Beat until fluffy. Add the next cup, beat again, then add the final cup.


Beat until smooth.

Add the milk, maple syrup, cinnamon and vanilla, and beat for several minutes until frosting becomes stiff.

I prefer a star tip when frosting with buttercream. It's just so pretty!


And... yeah... pretty good, my helper says.


Now, an important part-- the cleanup... and I was particularly glad to have a helper for this part!


Now for our reward... yum yum!


You have now made cupcakes from scratch... doesn't it feel good? (More importantly... doesn't it TASTE good??) I hope I have convinced you how easy it can be to make something fantastic... if not, stay tuned for next week, when I will bring you a... seasonally appropriate treat-- no tricks required :)